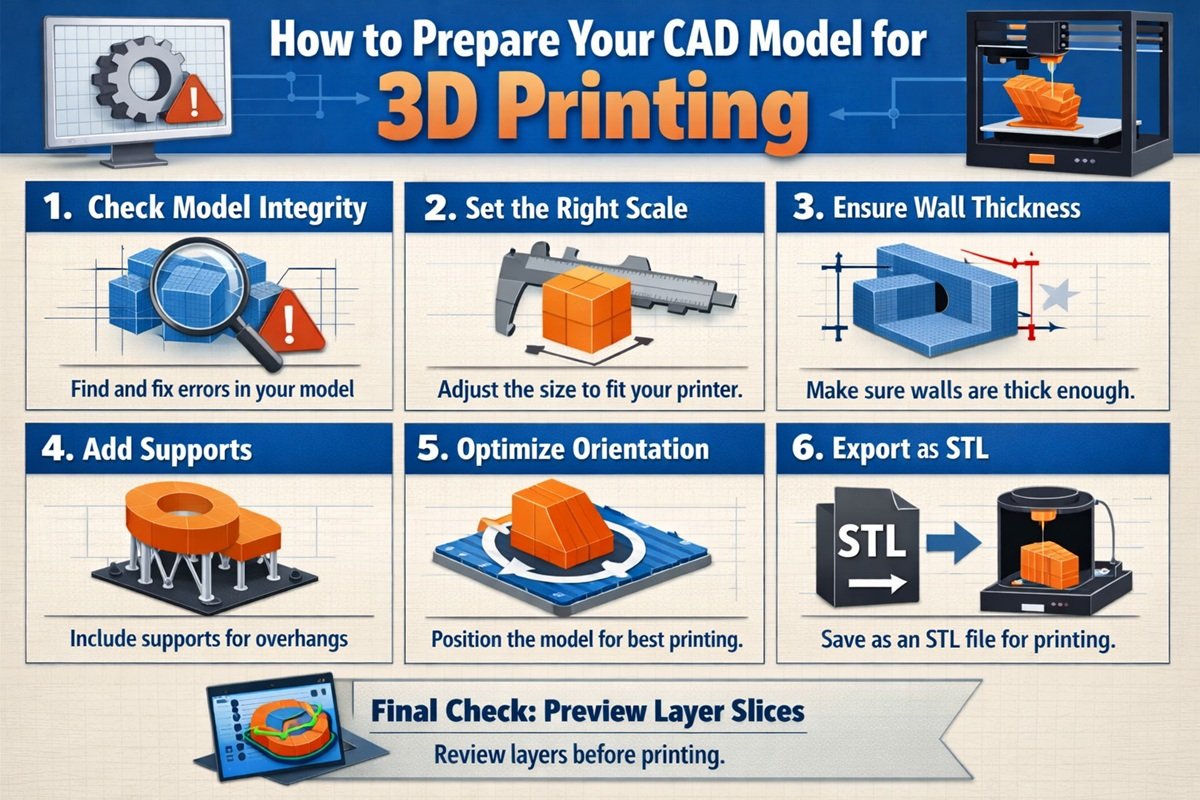
From Sketch to STL: How to Prepare Your CAD Model for 3D Printing
A step-by-step guide for CAD professionals on preparing models for 3D printing, from initial sketching to exporting clean, error-free STL files.
For CAD business owners and product design teams, 3D printing has become an essential part of prototyping and manufacturing workflows. However, creating a design that looks good in CAD software is not enough. To ensure successful prints, models must be properly prepared and optimized before exporting to STL format.
This guide walks you through the complete process, from initial sketching to generating a clean, print-ready STL file.
Understanding the CAD to 3D Printing Workflow
The journey from concept to physical object involves several critical steps. A typical workflow includes sketching, 3D modeling, validation, and file conversion.
The final output for most 3D printers is an STL (Stereolithography) file, which represents the surface geometry of a 3D object using triangular meshes.
Step 1: Start with a Solid Design Foundation
Every successful 3D print begins with a well-planned design. Whether you are using parametric modeling or direct modeling, the structure of your CAD model plays a crucial role in printability.
- Ensure dimensions are accurate and aligned with real-world requirements
- Design with manufacturing constraints in mind
- Avoid unnecessary complexity in early stages
For business applications, aligning design intent with production capabilities reduces costly revisions later.
Step 2: Create a Watertight Model
A watertight model, also known as a manifold model, is essential for 3D printing. This means the geometry must form a completely closed volume without gaps or holes.
Common issues include:
- Open edges or missing faces
- Non-manifold geometry
- Intersecting or overlapping surfaces
Most CAD software includes tools to check and repair these issues before export.
Step 3: Optimize Wall Thickness
Wall thickness is a critical factor in 3D printing. If walls are too thin, the print may fail or produce fragile parts. If too thick, it increases material usage and cost.
- Follow printer-specific minimum thickness guidelines
- Balance strength and material efficiency
- Consider the intended use of the final product
For functional prototypes, durability should be prioritized over material savings.
Step 4: Check for Overhangs and Support Requirements
3D printers build objects layer by layer, which makes overhangs a potential challenge. Features extending beyond a certain angle may require support structures.
- Minimize steep overhangs where possible
- Design self-supporting angles (typically 45 degrees or less)
- Plan for support removal in post-processing
Reducing the need for supports improves print quality and reduces finishing time.
Step 5: Simplify and Optimize Geometry
Highly complex models with excessive details can lead to large file sizes and longer processing times.
- Remove unnecessary features that do not impact functionality
- Use fillets and chamfers strategically
- Reduce polygon count while maintaining accuracy
Optimized geometry ensures faster slicing and more reliable printing.
Step 6: Validate Model Scale and Units
One of the most common issues in 3D printing workflows is incorrect scaling. Always verify that your model uses the correct units before exporting.
- Confirm units (mm, inches, etc.)
- Check overall dimensions
- Perform test exports if necessary
Incorrect scaling can result in unusable prints and wasted material.
Step 7: Export to STL Format
Once the model is finalized, it must be exported as an STL file. During export, several parameters affect the quality of the output.
- Resolution: Higher resolution creates smoother surfaces but larger file sizes
- Tolerance: Controls how closely the mesh follows the original geometry
- Binary vs ASCII: Binary files are smaller and preferred for most workflows
Choosing the right export settings is essential for balancing quality and performance.
Step 8: Use Mesh Repair and Validation Tools
Before sending the STL file to a 3D printer, it should be validated using mesh repair tools.
- Check for mesh errors and fix them
- Ensure normals are correctly oriented
- Repair holes and intersecting triangles
Software tools like mesh analyzers can automatically detect and resolve common issues.
Step 9: Prepare for Slicing
Slicing software converts STL files into instructions for the 3D printer. This step involves setting parameters such as layer height, infill density, and print speed.
- Adjust settings based on material type
- Optimize layer height for quality vs speed
- Configure infill for strength and weight balance
Proper slicing settings directly influence the final print outcome.
Common Mistakes to Avoid
- Ignoring manufacturability during design
- Exporting models with errors or gaps
- Using incorrect units or scale
- Overcomplicating geometry
- Skipping validation before printing
A structured workflow helps eliminate these issues and ensures consistent results.
Business Impact of Proper CAD Preparation
For CAD service providers and product design businesses, preparing models correctly for 3D printing has direct financial implications.
Efficient workflows reduce material waste, minimize print failures, and shorten production cycles. This leads to faster delivery times and improved client satisfaction.
Additionally, offering 3D print-ready models as a service can create new revenue streams and position your business as a full-service design and manufacturing partner.
Final Thoughts
Transitioning from sketch to STL is more than a technical process. It requires a clear understanding of both design principles and manufacturing constraints.
By following a structured approach and focusing on optimization, CAD professionals can ensure their models are not only visually accurate but also fully functional in real-world applications.
For CAD business owners, mastering this workflow is essential to staying competitive in the growing field of additive manufacturing.